There are many WordPress plugins for Post Grid Layout, but some of these are useful.
So here I will tell you the best Post Grid Layout plugin and its use with all about its options in detail.
In my opinion the Content Views – Post Grid & List for WordPress is the best WordPress Post Grid & List Layout plugin, it is a free plugin, and iam using this plugin personally.
Let’s start the step by step guide of this plugin.
Video Tutorial
Step 1:
First of all download Content Views plugin.
For this go to Plugins →Add New
and search for Content Views
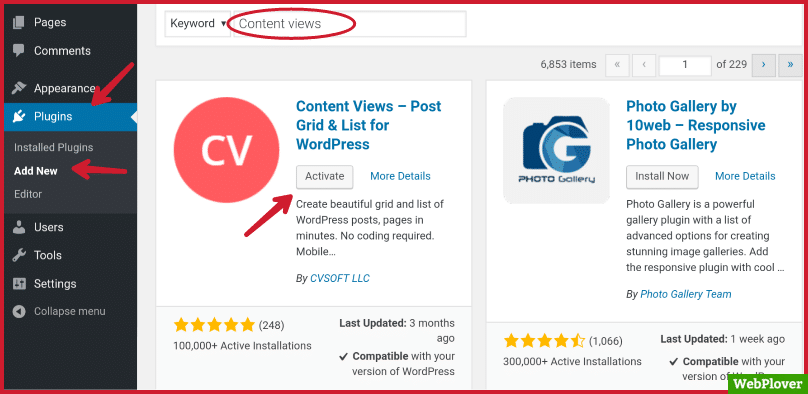
Install and activate it.
Step 2:
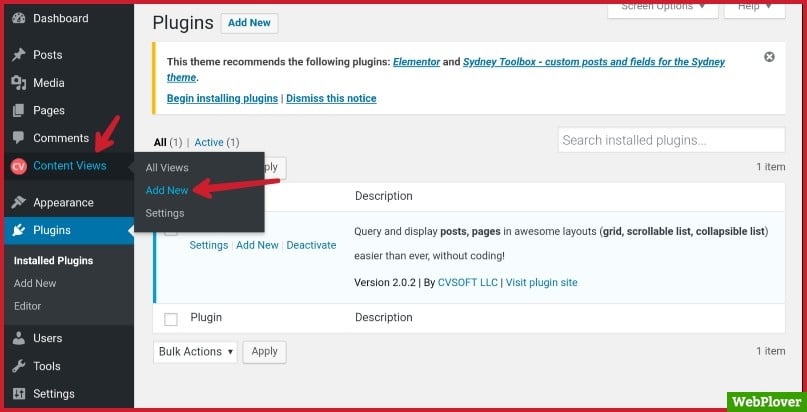
Now click on Content Views in the side bar then on Add New to add a view.
Step 3:
Enter a name in Title to identify your view.

Under the Title in Filter Settings, there are three sections
- Content type
- Common
- Advance
Content type :
Here yo can select Post or Page
If you want to Post Grid Layout then select Post , or select Page for Page Grid Layout
Common :
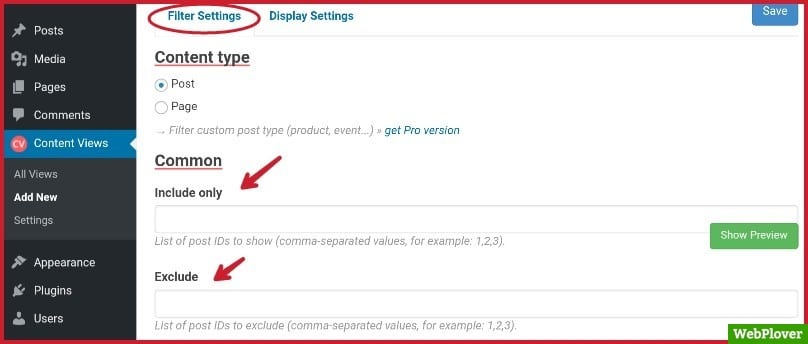
In this section there are three options
- Include
- Exclude
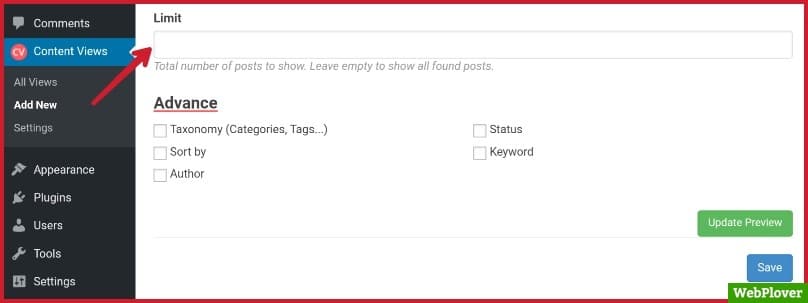
- Limit
- Limit
I mention the Limit option first. Here you can able to enter the total number of posts in digits, then the limited posts will be showing in view, or if you want to show all your posts in Grid Layout, then leave it empty.
- Exclude
This option is working with Limit option, here you can enter the Posts ID with (comma-separated values, for example: 1,2,3) to exclude these posts from view.
Learn about Post ID What is Post ID?
- Include:
This option is working alone (mean without the Exclude & Limit options)
Here you can include posts to view by adding the Post ID.
You can include Posts ID with comma-separated values, for example: 1,2,3
After including Posts ID, only that posts will be showing in Grid Layout.
Advance :
In this section there are five options
- Taxonomy (Categories, Tags…)
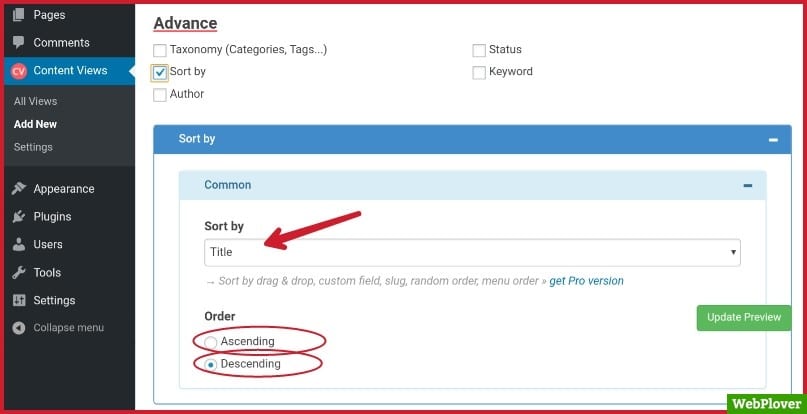
- Sort by
- Author
- Status
- Keyword
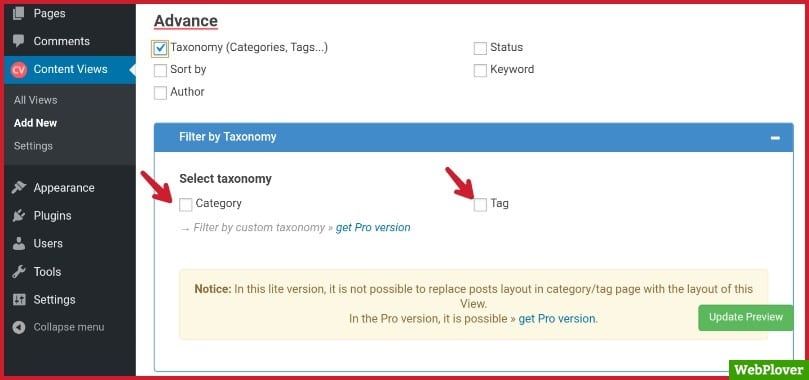
- Taxonomy (Categories, Tags…)
Here you can choose the posts to showing in view by choosing Categories & Tags.
- Sort by
Here you can choose the posts to showing in view by selecting ID, Title, Published Date & Modified Date by Ascending order or Descending order.
- Author
Here you can select the posts to showing in view by choosing author.
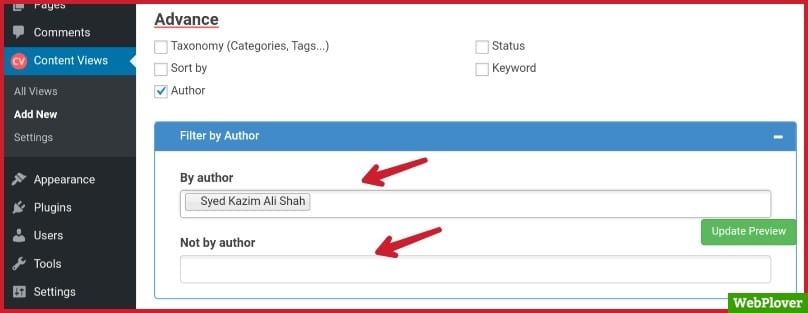
- Status
Here you can choose the posts to showing in view by selecting the post status (For Example: Published, Private, Pending, Draft etc)
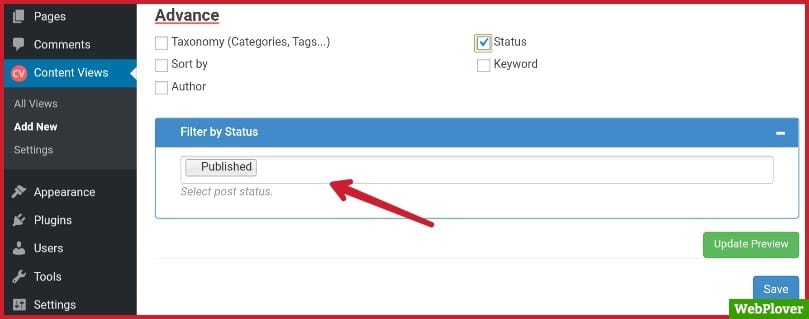
- Keyword
Here you can choose the posts to showing in view by entering keyword to searching for posts.
It will search keyword in title, excerpt, content of posts.
Step 4 :
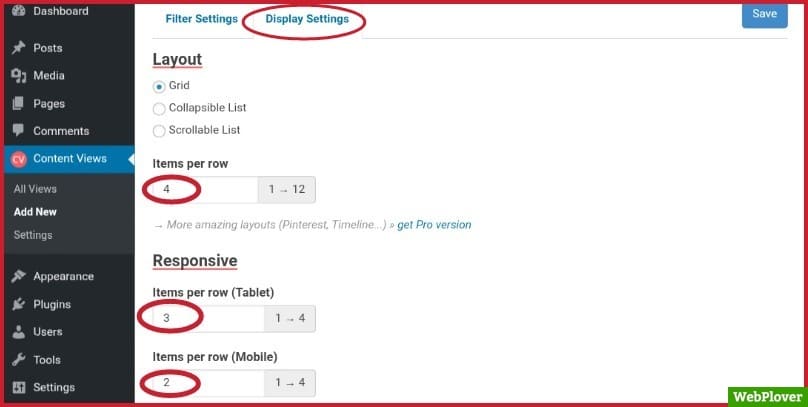
Now click on Display Settings, there are six sections.
- Layout
- Responsive
- Format
- Fields settings
- Pagination
- Others
1 : Layout
Here you can choose the layout of your choice in Grid, Collapsible List & Scrollable List.
and also enter a number to showing items (posts or pages) per row, in desktop version.
2 : Responsive
In this section you can enter a number to showing items (posts or pages) per row, in Tablet & Mobile versions.
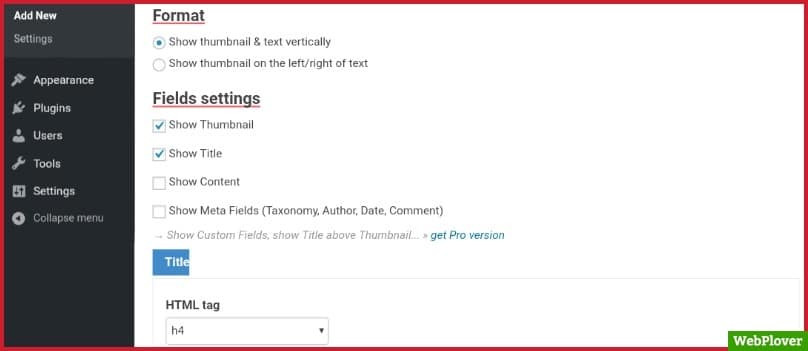
3 : Format
Here you can choose the Thumbnail and the Text style by selecting Show thumbnail & text vertically OR Show thumbnail on the left/right of text
4 : Fields settings
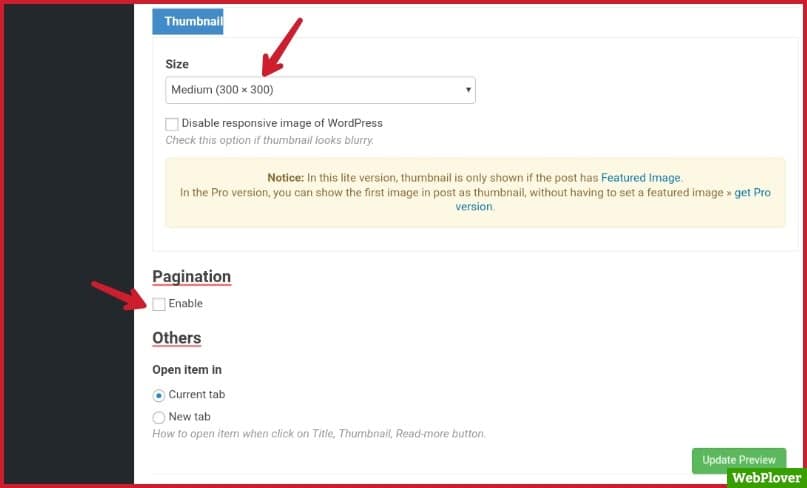
Here yo can First: Select or Deselect the fields of post to show. 2nd: Set the Title text style. 3rd: Select the Thumbnail size. 4th: Select the post Excerpt length.
5 : Pagination
Here you can enable or disable the Pagination by check or uncheck the box.
6 : Others
Here you can choose an option to enable item in Current tab or in New tab ,when user click on Title, Thumbnail, Read-more button.
Step 5 :
After customize the setting of this plugin click on Save button to save the view.
Now you can show the view in pages, posts or widgets by using Shortcode, and also show the view in Theme Files by using the PHP code.

Here are a few tutorials for you to read next:
- How to Install WordPress Plugin Step by Step
- How To Add Social Media Icons To WordPress Menu
- How to Find Post, Page, Category, or User ID in WordPress
- How to create Table in WordPress [With Pictures]
- How to Exclude Specific Category Posts From Your WordPress Home Page
If you have any questions, don’t hesitate to let me know through comment or email, i will try to help you.
If you find this article helpful, then please Subscribe to our YouTube Channel for video tutorials, and share this article on social media.


